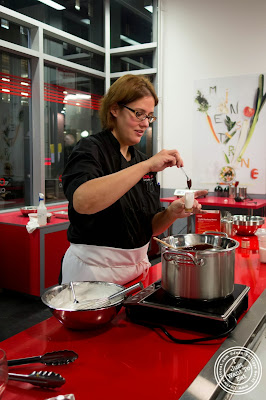
I was recently invited for a cooking class with bloggers at Cook & Go Culinary Studio located in Chelsea.
Cook & Go started few years ago in France, more precisely in Lyon that is the capital of Gastronomy there. Their classes target people who are not professional or advanced cooks and want to learn simple recipes in a relaxed atmosphere. You come, cook and then go with the food you just made so your friends and family can try!
The place is big and can host up to 80 people. Of course, there is no way that 80 people can cook at the same time or in that case it will have to be uncooked dishes like some we made. Interestingly, some companies are organizing events there: good idea for team building sessions.
Our teacher (and Chef), Christine, made the experience very relaxed, with no pressure, providing useful tips.
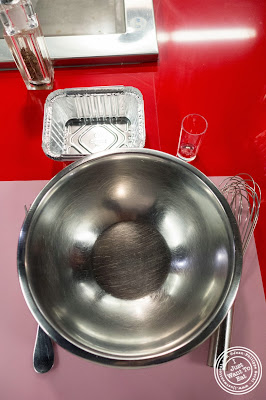
Each of us had its own space setup.
And I was ready to start! Au menu were:
- Purses filled with pear, brie and raspberry.
- Tuscan White Bean Crostini.
- Apricot Chicken.
- Cakes filled with dates.
- S'mores shooters.
The recipes below were courtesy of Cook & Go.
The first dish was Purses filled with pear, brie and raspberry.
Ingredients:
1 puff pastry sheet, thawed
8 oz brie
24 raspberries
2 pears sliced and caramelized
Preheat oven to 400ºF.
Unfold on a lightly floured surface:
1 puff pastry sheet , thawed. Using a rolling pin, roll the sheet into a 10x15-inch rectangle.
Cut into 24 (2 1/2-inch) squares.
Divide the brie, raspberries, and pears among the pastry. Close like a purse.
Bake for 15 minutes or until the pastries are golden brown. Et voilà!
It was delicious, but I should have put more brie in it. Problem was that with more cheese, I am not sure I would have been able to close the pastry...
The second recipe was Tuscan White Bean Crostini:
Yield: 6 servings
Ingredients:
2 cans (15 ounces each) white beans (such as Great Northern or cannellini), rinsed and drained
1/2 large red bell pepper, finely chopped or 1/3 cup finely chopped roasted red bell pepper
1/3 cup finely chopped onion
1/3 cup red wine vinegar
3 tablespoons chopped fresh parsley
1 tablespoon olive oil
2 cloves garlic, minced
1/2 teaspoon dried oregano
1/4 teaspoon black pepper
18 slices French bread, about 1/4 inch thick
Directions:
1.Combine beans, bell pepper and onion in large bowl.
2.Whisk together vinegar, parsley, oil, garlic, oregano and black pepper in small bowl. Pour over bean mixture; toss to coat. Cover; refrigerate 2 hours or overnight (of course we did not do this at the class).
3.Arrange bread slices in single layer on large ungreased baking sheet or broiler pan. Broil, 6 to 8 inches from heat, 30 to 45 seconds or until bread slices are lightly toasted. Cool completely.
4.Top each toasted bread slice with about 3 tablespoons bean mixture.
It was good and refreshing, a perfect amuse bouche if you have guests, but a bit tough to eat as the garnish tends to fall off the bread...
After that, we made Apricot Chicken:
Yield: 6 servings.
Ingredients:
1 1/2 pounds apricots, roughly chopped, pits removed and discarded
1/4 cup sugar
2 Tbsp cider vinegar
2 pounds skinless chicken breasts, cut into 1 to 2-inch pieces
Salt
1 Tbsp unsalted butter (can sub olive oil)
3 Tbsp olive oil
1 chopped onion
2 cups chicken stock or broth (use gluten-free stock if you are cooking gluten-free)
1 Tbsp chopped fresh rosemary
1 teaspoon cinnamon
2 teaspoons Tabasco or other hot sauce (you can add more if you like)
Black pepper
Directions:
1 Place the chopped apricots in a large bowl. Stir in the sugar and the vinegar. Let sit while you brown the chicken in the next step.
2 In a large sauté pan, heat 1 tablespoon of the butter and 1 tablespoon of olive oil over medium-high heat. Working in batches, place chicken pieces in the pan, without crowding the pan, and brown them on each side. As the chicken cooks, sprinkle salt over it. Once the chicken is browned, remove the pieces from the pan to a bowl and set aside.
Note: this is where the recipe differs: we just put all the ingredients in a bowl as showed on the photo below and cooked it in the oven.
3 Add the remaining oil to the pan and sauté the onion until it begins to brown. As the onion cooks and releases moisture, use a flat edged spatula or wooden spoon to scrape off the browned bits from the chicken (called fond) from the bottom of the pan.
4 Once the onions have browned a bit, add the chicken stock and lower the heat to medium.
5 Put about 2/3 of the apricots, along with any juice they have given up, into a blender and blend into a purée. Pour the purée into the pan with the chicken stock and onions.
6 Add the cinnamon, rosemary and Tabasco and taste. You may need to add some salt. Bring to a simmer, then lower the heat and gently simmer for 10-20 minutes.
7 When you are ready to serve, put the chicken and the remaining apricot pieces into the pan and simmer gently for 5 minutes.
Serve hot with rice.
This was my least favorite dish: although the chicken was moist (I cut large ribbons, smaller would have make it dry), it was very sweet; too sweet.
After the apricot chicken, we cooked Cakes filled with dates:
Directions:
In a bowl, measure the butter, cream and sugar. Mix with a spatula until blended. Add sunflower oil, and orange blossom. Mix again. Add flour and mix.
Refrigerate. In another bowl, measure your dates and remove the pits. Chop coarsely and add the orange blossom and cinnamon. Mixing to obtain a homogeneous mixture. Cut the dough into 4 pieces per serving. Place a piece of dough in hand. Flatten and widen slightly in the middle without a hole. Place the stuffing at the center and close the cake.
Arrange on a sulfurized paper and bake at 400 for 15 minutes.
This was, with the last dish below, my favorite: the cookie was buttery and flakey. I will sure try this one at home, probably with chocolate...
The last dish we cooked was dessert (shall I say long awaited?). It was S’more shooters:
Yield: 12 servings
Ingredients:
4 large egg whites
1 cup sugar
pinch of cream of tartar
1 teaspoons pure vanilla extract
Directions
Place egg whites, sugar, and cream of tartar in the heatproof bowl of an electric mixer. Set over a saucepan with simmering water. Whisk constantly until sugar is dissolved and whites are warm to the touch, 3 to 4 minutes.
Transfer bowl to electric mixer fitted with the whisk attachment, and beat, starting on low speed, gradually increasing to high, until stiff, glossy peaks form, 5 to 7 minutes. Add vanilla, and mix until combined. Use immediately.
Chocolate Glaze
Ingredients
12oz semi-sweet chocolate – chopped finely
1 cup of heavy cream
1 tbsp unsalted butter
1 tbsp light corn syrup
Directions
In saucepan on med-low heat, heat the cream until bubbles start to form – watch it very, very closely
Add chopped chocolate to med size bowl. Add cream and leave it for 2 mins. Slowly stir to melt chocolate (whisking quickly creates air bubbles)
Add butter and corn syrup. If mixture is not completely melted together, put in the microwave in 10 sec intrevals.
Assembly
The secret to these shooters and any layered dessert (Trifle) is to be very neat and tidy with your layers. That means making sure each layer is smoothed out evenly and touching the side of your dish but also the sides of the glass dish are kept clean. If you slop on the side and above the layer you are working on, take a cloth and wipe it otherwise the layers will not show properly. For creating this layered look in the shooter glasses, put your marshmallow frosting in a piping or ziploc bag. The glaze can be put in a bag but it will be in almost a liquid until cooled – use either a spoon or a ziploc bag.
Layer the following: put 2 tsp of graham cracker crumbs in each glass, marshmallow frosting, chocolate glaze and then repeat. If you are using a piping bag for the frosting, just swirl it in the glass but make sure it touches the edges. Once filled to the top, garnish with graham crumbs and chocolate chips.
This was fantastic and I cannot wait to make it at home (well, since Jodi knows that I can make it and saw the result, I do not have that much choice...).
I had a good time. I love the concept and truly appreciate the fact that the recipes are easy to make, so I can wow my family and friends next time I receive them!
If you are interested by a class, you can use this 15% coupon BPIBLOG at http://cook-and-go.com/
If you are interested by a class, you can use this 15% coupon BPIBLOG at http://cook-and-go.com/
Thank you to Cook & Go for inviting me to this great event.
Enjoy (I did)!
If you like this post or the photos, feel free to share it using the toolbar below or to write a comment!
And Remember: I Just Want To Eat!
Please note that this cooking class was complimentary. However, the opinions expressed in my blog are 100% my own!


thank you for sharing this post
ReplyDeleteonline fruit shopping store